Build a React Native iOS app on Windows and run it on your iPhone
This tutorial walks you through creating a React Native project on Windows from scratch, running it on an iPhone and seeing changes as you edit, then building an .ipa ready for the App Store. It’s for developers who write React Native on Windows and could only run the Android side before. You need an Apple Developer account, an iPhone and a USB cable, your computer and iPhone on the same local network, and you need to have installed KXBuild. Projects that use Expo follow a slightly different flow. See Build Expo iOS apps locally on Windows.
Create a project
To use an existing project, open its root folder (the one containing package.json) in VS Code with File > Open Folder…, or drag the folder into VS Code. Otherwise, create one as shown below.
Keep the project under a short path, such as D:\work. React Native dependency folders nest deeply, and a deep project path easily runs into path-too-long errors on Windows.
Create with the React Native Community CLI
The React Native docs give this command for creating a project without a framework. Use only letters and digits in the project name.
1cd D:\work
2npx @react-native-community/cli@latest init RnHello
The CLI creates the RnHello folder and installs the JS dependencies. The ios subfolder holds the Xcode project for iOS. On Windows the CLI skips the CocoaPods step, which you’ll do yourself later.
Create from a KXBuild template
The template installs dependencies and runs pod install for you. Use either of these.
- VS Code extension. Run KXBuild: New Project from the Command Palette and pick the “React Native App” template.
- Command line. Run
kxbuild project create -t react_native_app -n RnHello -o D:\work.
Run doctor
Do this first whenever you open a project for the first time. Doctor checks your React Native setup and prepares the iOS project. Use either of these.
- VS Code extension. In the title bar of the KXBuild view, open the ··· menu and run Doctor (fix environment).
- Command line. Run the command below.
1kxbuild doctor D:\work\RnHello
Install pods
React Native’s iOS dependencies are all installed with CocoaPods. Doctor doesn’t run pod install for you. For a project created with the Community CLI or pulled from a repository, run it once in the ios folder after doctor.
1cd D:\work\RnHello\ios
2pod install
Afterward the ios folder contains RnHello.xcworkspace. Build that from now on, not RnHello.xcodeproj. Run pod install again every time you add or upgrade an npm package with native code. For more, see Develop iOS apps with CocoaPods on Windows.
Change the bundle ID
The Community CLI generates a sample bundle ID starting with org.reactjs.native.example. Change it to your own before installing, and register an App ID with the same value in your Apple Developer account.
In the KXBuild view, right-click the RnHello target, choose KXBuild: Edit Target Settings, and edit Bundle Identifier on the General page. The Signing group on the same page lets you choose the team and signing style. See Project Settings Editor.
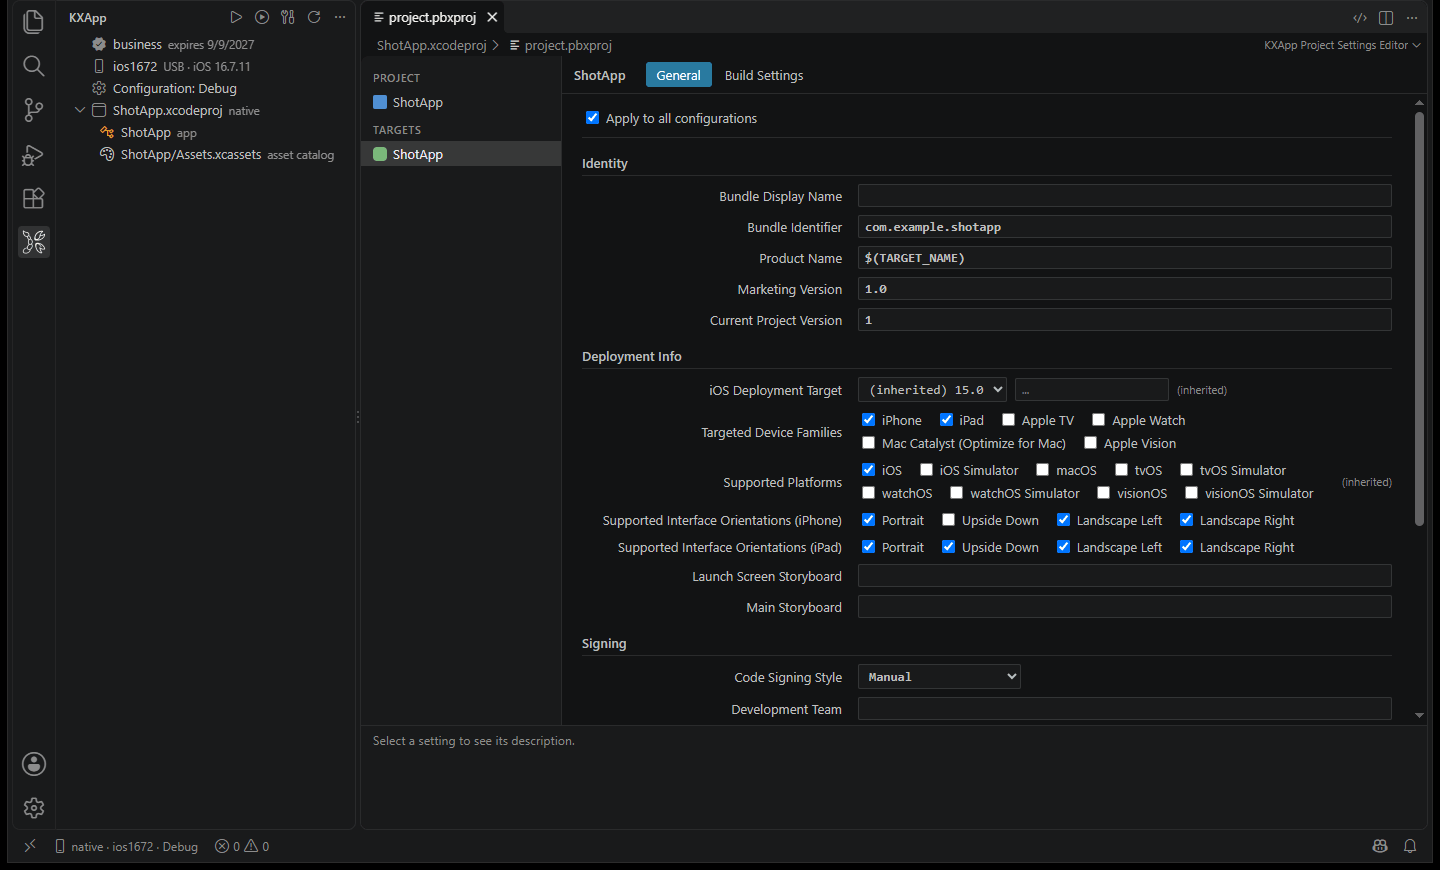
To run on a device, you also need an Apple Development certificate and a provisioning profile that includes this iPhone in the keychain folder. See Certificates and signing.
Connect your iPhone
Connect the iPhone with a cable. The first time, go through these steps in order.
- When the device node in the KXBuild view says “click to set up”, click it to install the Apple device drivers.
- Unlock the iPhone and tap Trust in the Trust This Computer prompt.
- On the iPhone, go to Settings > Privacy & Security > Developer Mode and turn it on. The iPhone restarts once.
- Click the iPhone under the device node in the KXBuild view to make it the active device.
For other cases, see Set up your device.
Start Metro
A Debug build contains no JS code. After launch, the app loads it over the local network from the Metro dev server on your computer. Open another terminal in VS Code, run the command below in the project root, and leave it running.
1npx react-native start
The iPhone must be able to reach port 8081 on your computer. The first time you use React Native with an iPhone on Windows, check these three things.
- The iPhone and computer are on the same Wi-Fi or local network. Guest networks and networks with client isolation don’t work.
- Windows Firewall allows inbound connections on port 8081. Open PowerShell as administrator and run the command below.
- The first time the app launches, iOS asks whether it may find devices on your local network. Tap Allow. If you tapped the wrong button, delete the app and install it again to get the prompt back.
1New-NetFirewallRule -DisplayName "Metro 8081" -Direction Inbound -Protocol TCP -LocalPort 8081 -Action Allow
Run on your iPhone with Fast Refresh
With Metro running, select the iPhone in the KXBuild view and press F5. KXBuild builds, signs, installs and launches the app, and attaches the native debugger. The first build compiles every pod, so it takes longer than later ones. The first time you debug on a given iOS version, KXBuild also downloads its device symbols. It’s a few GB, but only once.
When the app opens to the welcome screen, the JS has loaded from Metro. Day-to-day development then looks like this.
- Edit App.tsx in VS Code and save. Fast Refresh pushes the change to the iPhone right away and keeps component state.
- Shake the iPhone to open the Dev Menu, where you can reload manually or turn off Fast Refresh.
- For JS breakpoints, use React Native’s own debugging tools. Press j in the terminal running Metro to open React Native DevTools and set breakpoints in its Sources panel.
What you need to do depends on what you changed.
| What changed | What to do |
|---|---|
| JS, TS, styles, images | Just save. Fast Refresh updates the app |
| Installed a pure-JS npm package | Restart Metro, then reload on the iPhone |
| Installed an npm package with native code | Run pod install again in the ios folder, stop debugging and press F5 |
| Native code or Info.plist under the ios folder | Stop debugging and press F5 |
The Restart button on the debug toolbar doesn’t recompile. After changing anything native, always stop and press F5 again.
Debug native code
When you write native modules or track down a launch crash, you need breakpoints in Swift or Objective-C. Set a breakpoint in ios\RnHello\AppDelegate.swift or in your own native module, press F5, and execution stops there. Variables, the call stack, watch expressions and the Debug Console are the standard VS Code debug views, and you can type lldb commands directly in the Debug Console.
Native and JS breakpoints don’t interfere with each other, so you can use both at once.
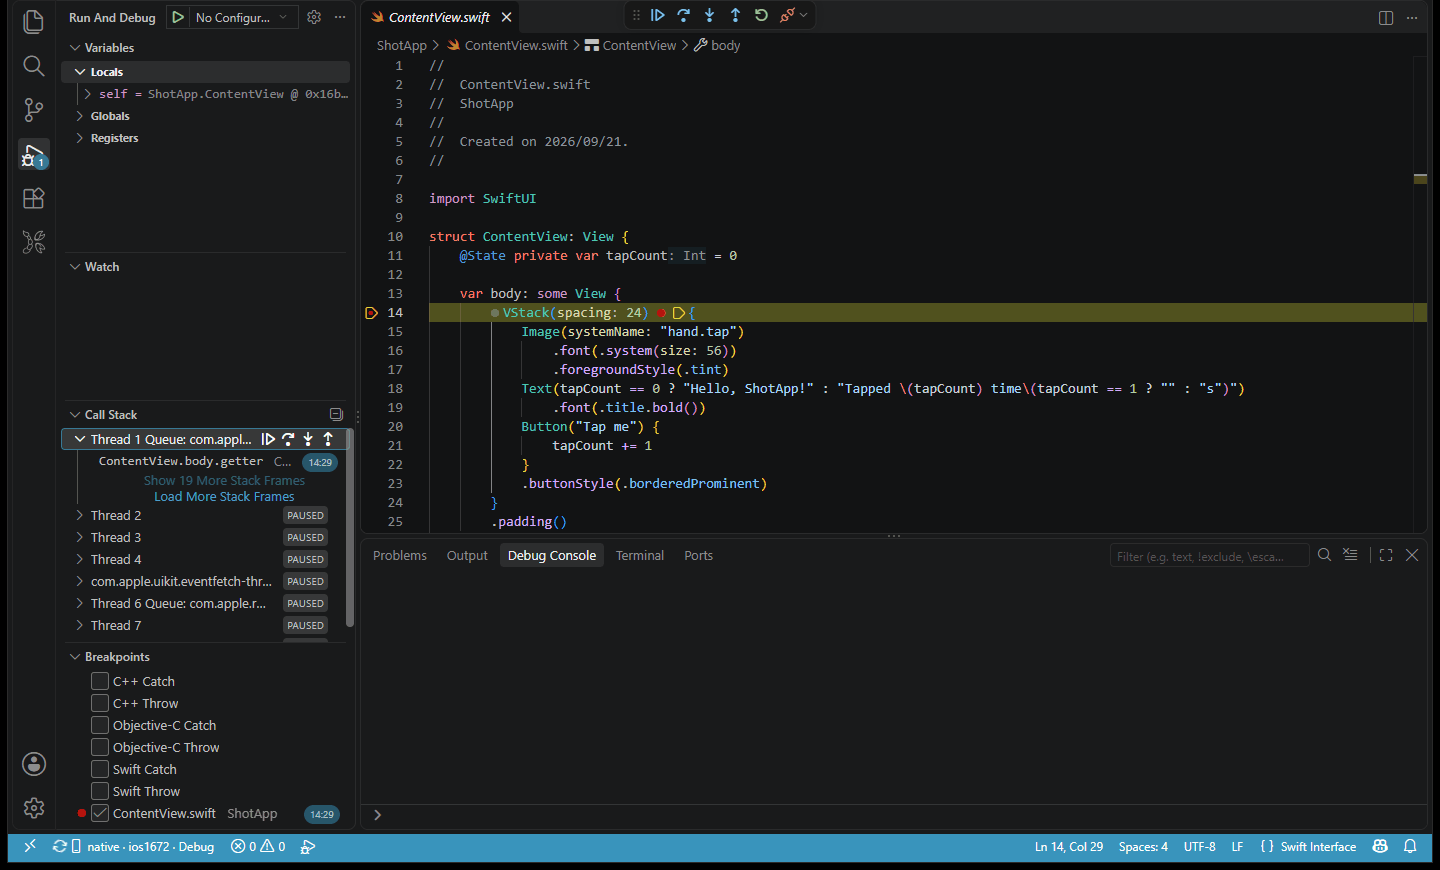
App output goes to Output > KXBuild Console and the build log to Output > KXBuild. For more ways to debug, see Run and debug.
Change the app name and icon
The name shown on the Home Screen is CFBundleDisplayName in ios\RnHello\Info.plist. Double-click the file in VS Code and change the value in the Property List Editor.
The iOS icon is the AppIcon set in ios\RnHello\Images.xcassets, which is empty in a new project. In the Explorer, right-click Images.xcassets and choose KXBuild: Open Asset Catalog. Select AppIcon, then use Fill All Sizes from 1024×1024 Image… and pick a square PNG of at least 1024 pixels. Every size is generated at once. Before submitting, click KXBuild: Compile-check Asset Catalog in the title bar, and any missing sizes are listed in the Problems panel. See Asset Catalog Editor.
xcodebuild in your existing scripts still works
Once KXBuild is installed, Windows has xcodebuild and xcrun commands with the same names as on macOS. Build scripts and CI scripts in your project that call xcodebuild don’t need changes. For example, this command runs on Windows as is.
1xcodebuild -workspace ios\RnHello.xcworkspace -scheme RnHello -configuration Debug -sdk iphoneos
The common options are supported. xcodebuild test and -exportArchive aren’t, so for an .ipa to submit to the App Store, use kxbuild build as in the next section. For the list of supported options, see xcodebuild and xcrun compatibility.
Build a Release .ipa
A Release build bundles the JS into the app, so it no longer needs Metro once installed. You can give it to others and submit it to the App Store.
First, raise the version. On the General page of the Project Settings Editor, change Marketing Version (the version shown on the App Store) and Current Project Version (the build number). Each upload to App Store Connect needs a higher build number than the last. The keychain folder needs an Apple Distribution certificate and an App Store provisioning profile.
Then build with the Release configuration. Use either of these.
- VS Code extension. Switch the configuration to Release in the Build configuration node of the KXBuild view, then run KXBuild: Build from the Command Palette.
- Command line. Run the command below in the project root.
1kxbuild build .\ios\RnHello.xcworkspace -c Release
When the build finishes, ios\build\RnHello.ipa is ready to upload. Create the app in App Store Connect, upload the .ipa with Appuploader on Windows, and when processing finishes, install it from TestFlight to check it on your iPhone before submitting it for review. For the full steps, see Release and App Store submission.
FAQ
The app shows a red screen saying it can’t connect to the development server
The iPhone can’t reach Metro on your computer, so it’s a network problem. Check, in order, that Metro is still running, that the iPhone and computer are on the same network, that the firewall allows port 8081, and that the app has local network permission on the iPhone. You can turn that permission on for the app in Settings > Privacy & Security > Local Network.
The build can’t find React headers or a pod
You haven’t run pod install, or you’re building the .xcodeproj. Run pod install in the ios folder and build the .xcworkspace from then on.
The build fails in the Run Script phase
React Native isn’t set up for this project yet, which often happens right after you pull the project or upgrade React Native. Run doctor again with the project path.
File name too long or file not found
The project path is too deep. Move the project to a short path such as D:\work and run pod install again. Doctor also turns on Windows long path support, which needs one administrator approval.
For other errors, see Troubleshooting.